

LabVIEW 2014, First 64-bit Version for Mac
It has been a while since I've posted here, but with good reason. We've been really busy working on rewriting large chunks of LabVIEW for Mac 64-bit (see also Christina Roger's mention).


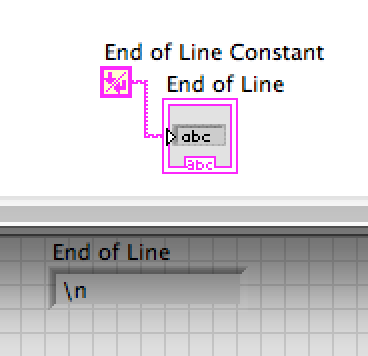 Another long overdue change was the "platform line ending." Since Mac OS X, most Mac software uses New Line (\n), however LabVIEW clung to the old Mac Classic Carriage Return (\r). The End of Line Constant (I know the icon shows New Line/Carriage Return) in the String palette returns what LabVIEW thinks is the platforms end-of-line character(s). Windows returns Carriage Return/New Line (\r\n). Linux returns New Line (\n). Mac 32-bit returns Carriage Return (\r) and Mac 64-bit return New Line (\n).
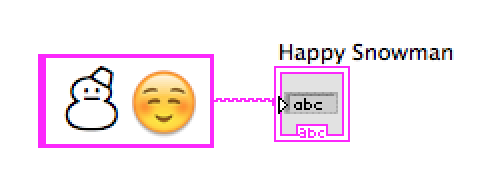 Mac LabVIEW 64-bit is the first LabVIEW that supports Unicode. When displaying, entering, copying, pasting, etc. strings, 64-bit LabVIEW assumes all the data is UTF-8. This has several ramifications. First, you can put emoticons in text. Pretty cool, but not that helpful. The other implication is that now there is no limit to what languages you can use for file/folder names (this ones for you, Socrates). In LabVIEW 32-bit on Mac, we had users who would name their hard drive something meaningful in their native language, which LabVIEW would then choke on and report it couldn't open the VI. LabVIEW 64-bit, because all strings are UTF-8, can handle any language in the path.
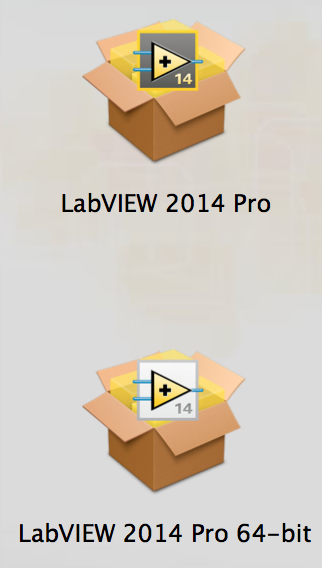 There are separate installers for LabVIEW 32-bit and 64-bit on the Mac LabVIEW media. We recommend you install both, as not all NI toolkits and addons are available for 64-bit yet.
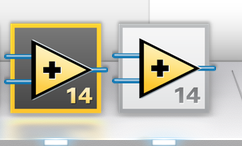 The Dock icon differs between 32-bit and 64-bit. Think of it as Coal (32-bit) and Solar (64-bit). The icons now also have the LabVIEW version on them. This makes it easier to tell the difference and switch between them when working with both simultaneously.

LabVIEW originated on the Mac APIs. Since then, LabVIEW was ported to Windows and Linux, and more modern APIs on those platforms. However, the Mac code largely remained unchanged, except for a minor rewrite for Mac OS X. When Apple switched to the NeXT based Mac OS X, they provided an API set named Carbon, which allowed for much of the pre-existing code to come across without much change. When LabVIEW was ported to Mac OS X, we took advantage of several POSIX APIs that we had battle-tested on Linux, and there were some changes to take specific use of Mac OS X, but much of the old API usages were not changed.
Then Apple decided not to port Carbon APIs to 64-bit. Apple has also deprecated much of the Carbon APIs. So we launched out to rewrite the Mac-specific sections of LabVIEW to be more modern and take advantage of Apple's new and forward looking Cocoa API. We decided the best way to do this and make sure we didn't miss anything that still called into Carbon APIs, was to port LabVIEW to 64-bit on the Mac.
We didn't want to do another minimal-port like we did when we went to Mac OS X. We wanted to fix as much as we could. We put together a terrific team of great developers on the LabVIEW team, and got to work on evaluating what needed be rewritten, what needed to change and what should stay the same. So here are some of the differences between Mac 32-bit and Mac 64-bit and VIs to help with the transition.
Fast
Depending on the operation, 64-bit LabVIEW on Mac is noticeably faster. There are a couple of corner cases where small sub-sections of the code are slightly slower, but everything else we've tested is somewhere between slightly faster to much faster. We went down to the C-Code subroutine level to compare performance between 32-bit and 64-bit to make sure we were not slowing LabVIEW down in porting to 64-bit. We were pleasantly surprised.
POSIX Paths
This was long overdue. Paths in 32-bit are formatted in HFS Classic format. 64-bit uses the more common POSIX paths. It's mostly showing slash (/) instead of colon (:) between path elements (although there is more to it than that).
There is also a little bit of magic that happens in 64-bit when a path in a string is converted to a path type that allows either format, and then converts it into POSIX style. You can try this by copying the path from the 32-bit path indicator and paste it into the 64-bit indicator. Once focus leaves the indicator, the path will be converted to POSIX format (it's pretty fun to watch).
This magic also happens when using the String to Path primitive. You can have a string of either format and it will convert it to a POSIX path. This makes it easier to transition between 32-bit and 64-bit as you are testing your VIs in 64-bit.
Some other VIs that assist in dealing with paths between 32-bit and 64-bit are Path to Command Line String.vi and Command Line String To Path.vi in Programming -> String -> Path/Array/String Conversion palette. These VIs are helpful in building a path that can be used in System Exec.vi or system shared libraries in a cross-platform manner. They have actually existed in LabVIEW since before 2009, but are added to the palettes now to assist in transitioning between 32-bit and 64-bit on Mac.
Another path related VI that is helpful for Mac users is Executable Path To Command Line String.vi. This VI helps in getting the path to the executable in an app.

This is particularly helpful writing cross platform code that will launch LabVIEW built apps, LabVIEW itself, or other GUI applications. Windows and Linux just take the path to the EXE. On Mac, the .app is really just a folder. This VI will give you a path to the executable you can call from System Exec.vi, in a cross-platform way. This VI did not make the cut for the palettes, but you can find it in vi.lib/AdvancedString.
POSIX Line Ending
Another long overdue change was the "platform line ending." Since Mac OS X, most Mac software uses New Line (\n), however LabVIEW clung to the old Mac Classic Carriage Return (\r). The End of Line Constant (I know the icon shows New Line/Carriage Return) in the String palette returns what LabVIEW thinks is the platforms end-of-line character(s). Windows returns Carriage Return/New Line (\r\n). Linux returns New Line (\n). Mac 32-bit returns Carriage Return (\r) and Mac 64-bit return New Line (\n).
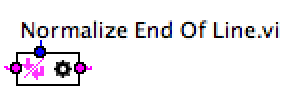
To assist in handling line endings from various environments, we now have Normalize End Of Line.vi in the String palette. This VI has shipped with LabVIEW since before LabVIEW 2009, but is now available in the palettes. This VI takes a string and converts all the line endings in the string to a standard end of line. That way, no matter what the source of the string (Windows, Linux, Mac LabVIEW 32-bit, etc), you can normalize the end-of-lines in the string and then parse the string regardless of the source.
 AESend is Dead, Run AppleScript Code Instead
LabVIEW used to communicate with other applications on the Mac using Apple Events via AESend family of VIs. We have removed those from the palettes and added Run AppleScript Code.vi (in Connectivity -> Libraries & Executables next to System Exec.vi). AppleScript is easier for most people to use, and you can test the code in Apple's AppleScript Editor app. The AESend family of VIs still ships with LabVIEW, but is deprecated and we encourage users to move to Run AppleScript Code.vi (NOTE: LabVIEW 2014, both 32-bit and 64-bit, shipped with a crash when running the AESend family of VIs. This is expected to be fixed in a future version). The AESend family of VIs will not work in 64-bit.
Unicode / UTF-8
Mac LabVIEW 64-bit is the first LabVIEW that supports Unicode. When displaying, entering, copying, pasting, etc. strings, 64-bit LabVIEW assumes all the data is UTF-8. This has several ramifications. First, you can put emoticons in text. Pretty cool, but not that helpful. The other implication is that now there is no limit to what languages you can use for file/folder names (this ones for you, Socrates). In LabVIEW 32-bit on Mac, we had users who would name their hard drive something meaningful in their native language, which LabVIEW would then choke on and report it couldn't open the VI. LabVIEW 64-bit, because all strings are UTF-8, can handle any language in the path.CINs are gone, use Call Library Function Node
On all 64-bit LabVIEW platforms, CIN is no longer supported. All of the functionality is available via the Call Library Function Node (in Connectivity -> Libraries & Executables next to System Exec.vi). Since Apple supports Universal Libraries, LabVIEW on Mac does nothing special to differentiate between 32-bit and 64-bit in library names. If you have a framework or dylib that you want to call into from both 32-bit and 64-bit, make sure it is a universal binary. You can use the lipo command line tool to merge binary code from 32-bit and 64-bit into a universal binary.
Miscellaneous
There are separate installers for LabVIEW 32-bit and 64-bit on the Mac LabVIEW media. We recommend you install both, as not all NI toolkits and addons are available for 64-bit yet.The Dock icon differs between 32-bit and 64-bit. Think of it as Coal (32-bit) and Solar (64-bit). The icons now also have the LabVIEW version on them. This makes it easier to tell the difference and switch between them when working with both simultaneously.
LabVIEW 32-bit is still in /Applications/National Instruments/LabVIEW 2014 folder. LabVIEW 64-bit is in a sibling folder named LabVIEW 2014 64-bit.
I encourage you to try out LabVIEW 64-bit and leave me a comment below as to what other differences you have found.
posted by Marc | 11:09 AM
|
21 comments
![]()


